How build code
Platform support
Framework:
Arduino
This code is made to be used with:
All (with Standard Library c++11 support)
Attention
Code will not compile on boards without standard library c++11 support.
Assembling dependencies
The SYSROX code uses repo to synchronize all necessary repositories. The app_ins can not work without the necessary libraries and it is recommended to use repo or a zip file containing all dependencies.
Using repo
The repo system is a tool made by google to manage multiple git repositories. With a file (manifest) containing all the repositories links, it is possible to clone et keep synchronized all project dependencies with a single command.
Tip
The idea is to repo sync the code the first time, do modifications in one or multiple repositories. When the base code is updated, all repositories can be update to the latest version with repo sync. Custom modification can then be rebased on top of the new code!
Install repo
sudo apt-get install repo
If your distribution does not have a repo package, you can do:
mkdir -p ~/.bin
PATH="${HOME}/.bin:${PATH}"
curl https://storage.googleapis.com/git-repo-downloads/repo > ~/.bin/repo
chmod a+rx ~/.bin/repo
Create a folder of your choice to place the project and go to it.
Repo sync code with SSH key
repo init -u ssh://git@git.sysrox.com:2224/code/manifests/manifest_ins_sensors_only.git
repo sync
Repo sync code with HTTPS
repo init -u https://git.sysrox.com/code/manifests/manifest_ins_sensors_only.git
repo sync
Using platformio
The easiest way to use the code is to use platformio. It includes many tools to build, test and upload the code to the board. If you use vscode, you can install the extension and juste source the environment.
Sourcing the environment or using the cli is not mandatory as you can just repo sync the code and use platformio extension (on windows for example), but it simplifies the process as you just need to copy paste the following commands. If you can not do it, you can just use the platformio extension and install Expressif32 platform.
Platformio cli
pip install -U platformio
Platformio with vscode IDE
If vscode extension is installed, you can just source the env:
source ~/.platformio/penv/bin/activate
Build full code
The configuration file for the build is a conf.ini located in conf folder. We want to create a symbolic link or copy this file to the root of the project in order to be able to build:
ln -s src/appDM_ins_sensors_only/conf/conf.ini platformio.ini
Now we can build the code with:
pio run -e your_env
Example
pio run -e lolin_s3
and build+flash with:
pio run -e your_env --target upload
Example
pio run -e lolin_s3 --target upload
The your_env is the name of the environment you want to build for. You can find examples in platformio.ini file (ie the configuration file located in conf/conf.ini)
Example
[env:lolin_s3]
platform = espressif32
monitor_filters = esp32_exception_decoder
board = lolin_s3
framework = arduino
upload_speed = 921600
build_unflags = -Os
board_build.f_cpu = 240000000L
board_build.f_flash = 80000000L
board_build.partitions = default_16MB.csv
board_build.filesystem = spiffs
build_flags =
    -O2
    -DBOARD_HAS_PSRAM

    -I lib/libDM_ctrl/src/
    -I lib/libDM_no_dep_abstract_sensors/src/
    -I lib/libDM_no_dep_icm42688/src/
    -I lib/libMM_no_dep_lps_22hb/src/
    -I lib/libDM_no_dep_mmc5983ma/src/

    -I src/appDM_ins_sensors_only
lib_deps =
    SPI

[env:teensy41]
platform = teensy@4.17
board = teensy41
framework = arduino
board_build.f_cpu = 600000000L
; extra_scripts = pre:src/correct_clone.py
build_flags =
    -D TEENSY_OPT_FASTER ; -D TEENSY_OPT_SMALLEST_CODE can be faster

    -I lib/libDM_ctrl/src/
    -I lib/libDM_no_dep_abstract_sensors/src/
    -I lib/libDM_no_dep_icm42688/src/
    -I lib/libMM_no_dep_lps_22hb/src/
    -I lib/libDM_no_dep_mmc5983ma/src/

    -I src/appDM_ins_sensors_only
lib_deps =
    SPI
Attention
Do not forget to adapt the pins defined in common.hpp with the ones you want to use for your board. For esp32 (non S3), avoid using the GPIO 9-10-11 as they are used for the flash memory!
Use code with Arduino IDE
A packaged version of the code is available for Arduino IDE.
Attention
The code has been tested for framework arduino-espressif32 2.0.14. It might compile and work with more recent versions but results are not guaranteed. Ensure to test the correct behavior of the code after compilation, especially serial output (printing multiple data on the same line gave some weird results).
Extract libraries in the Arduino folder
First, you need to find the Arduino folder to put libraries on. You can find it here:
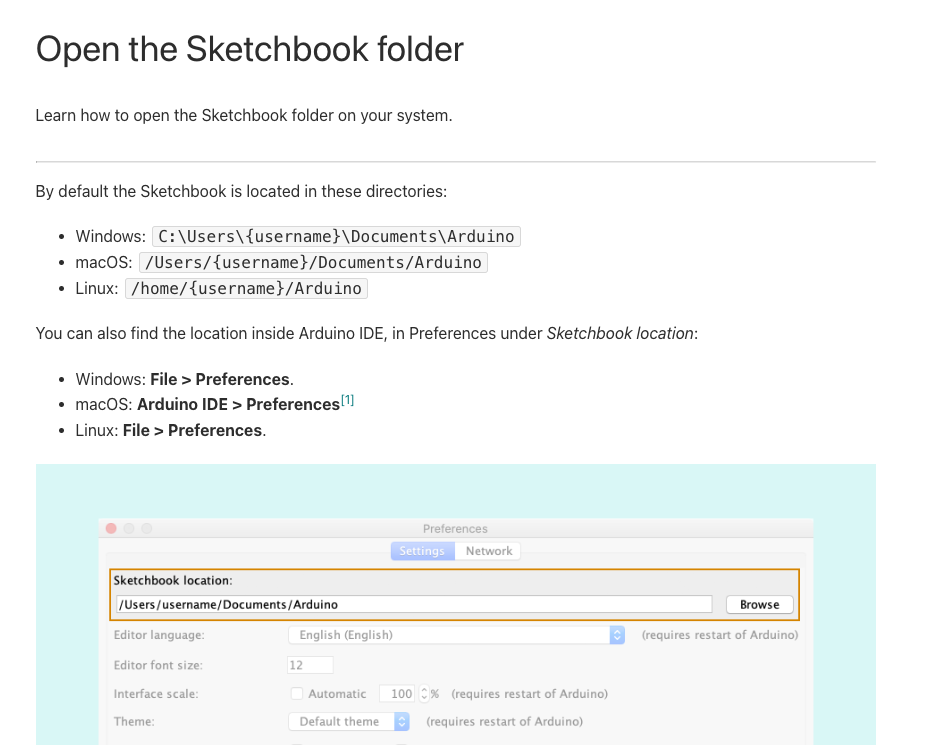
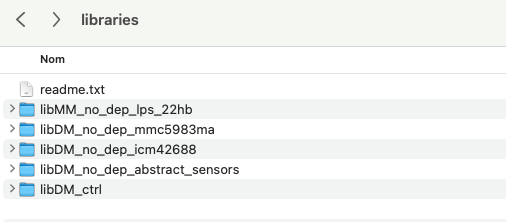
Then, you need extract the zip folder content and place it inside libraries folder. It should lool like this:
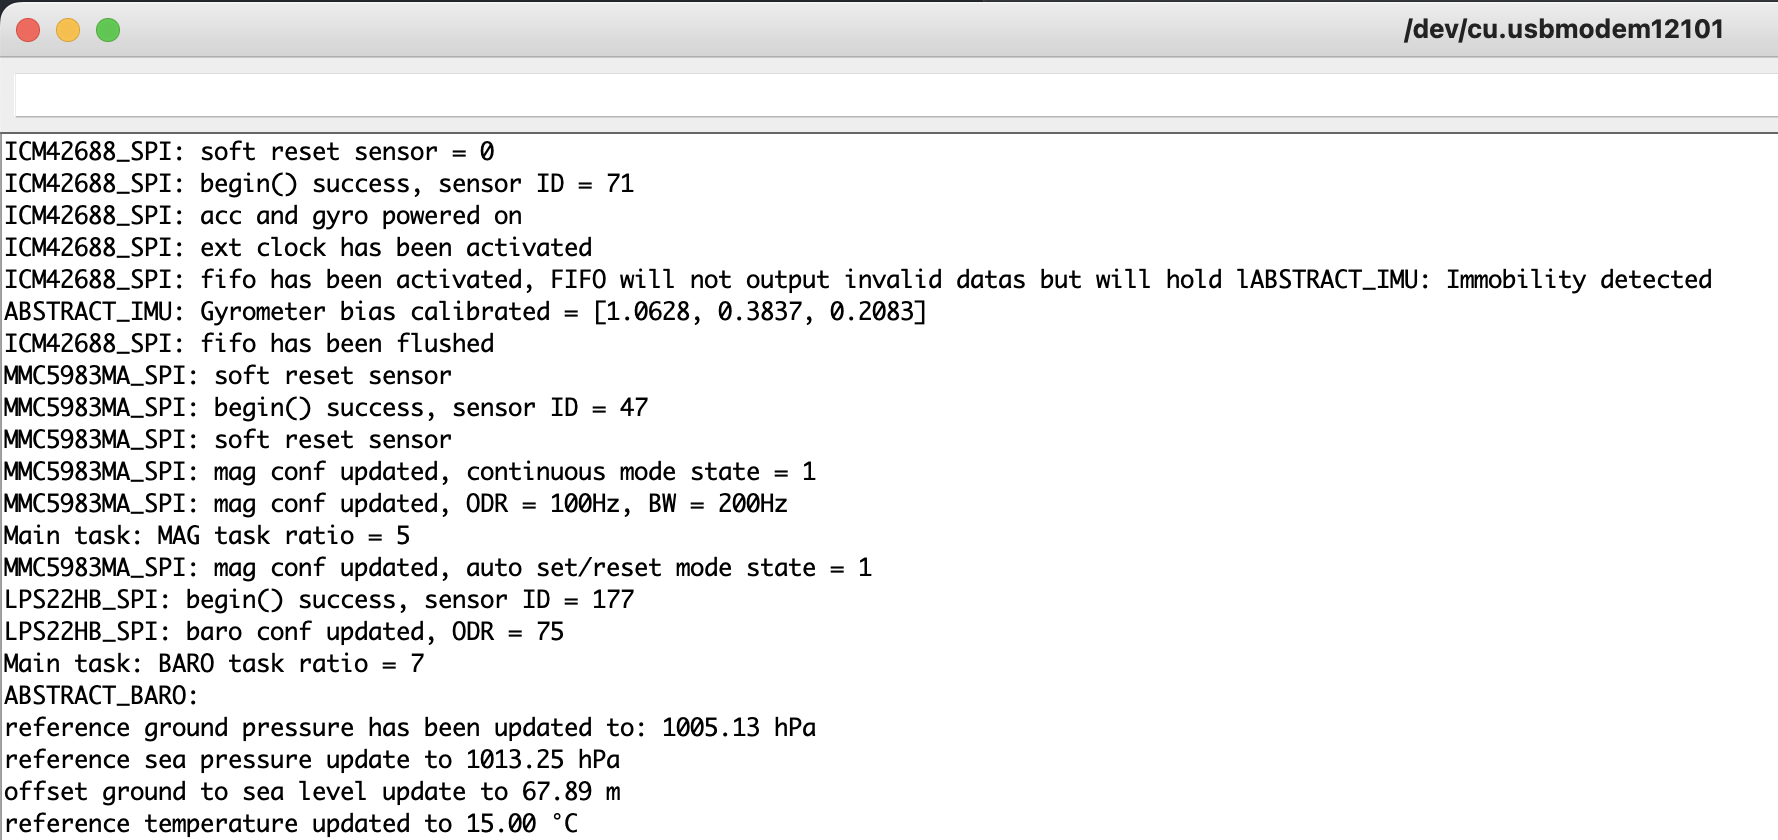
Build Arduino Sketch
Use the provided sketch to build the code for your platform. To make it work, do not forget to adapt PIN_CONFIG to the wiring GPIO you chose for your board.
Attention
Do not forget to adapt the pins defined in common.hpp with the ones you want to use for your board. For esp32 (non S3), avoid using the GPIO 9-10-11 as they are used for the flash memory!
You should be able to compile and flash the code to your board. You can use the serial monitor to confirm sensors are detected correctly: